Fun with SfM - Walkup Skydome

At an elevation of 6800', the Walkup Skydome is clear-span timber dome that was once the largest of its kind in the world. It is an impressive and other-worldly looking structure that appears to have crash landed in the middle of an otherwise homogenous sea of ponderosa pine forest. One summer afternoon, after a deep-dive into the mechanics of structure from motion (SfM), it seemed like an otherwise featureless continuously white dome would be an interesting challenge to try and model. With the added challenge of variable lighting conditions and a fresh coat of monsoon rain making the surface reflective in spots, I didn’t have high hopes for a model even being produced. In the end I was pleasantly surprised with the result!
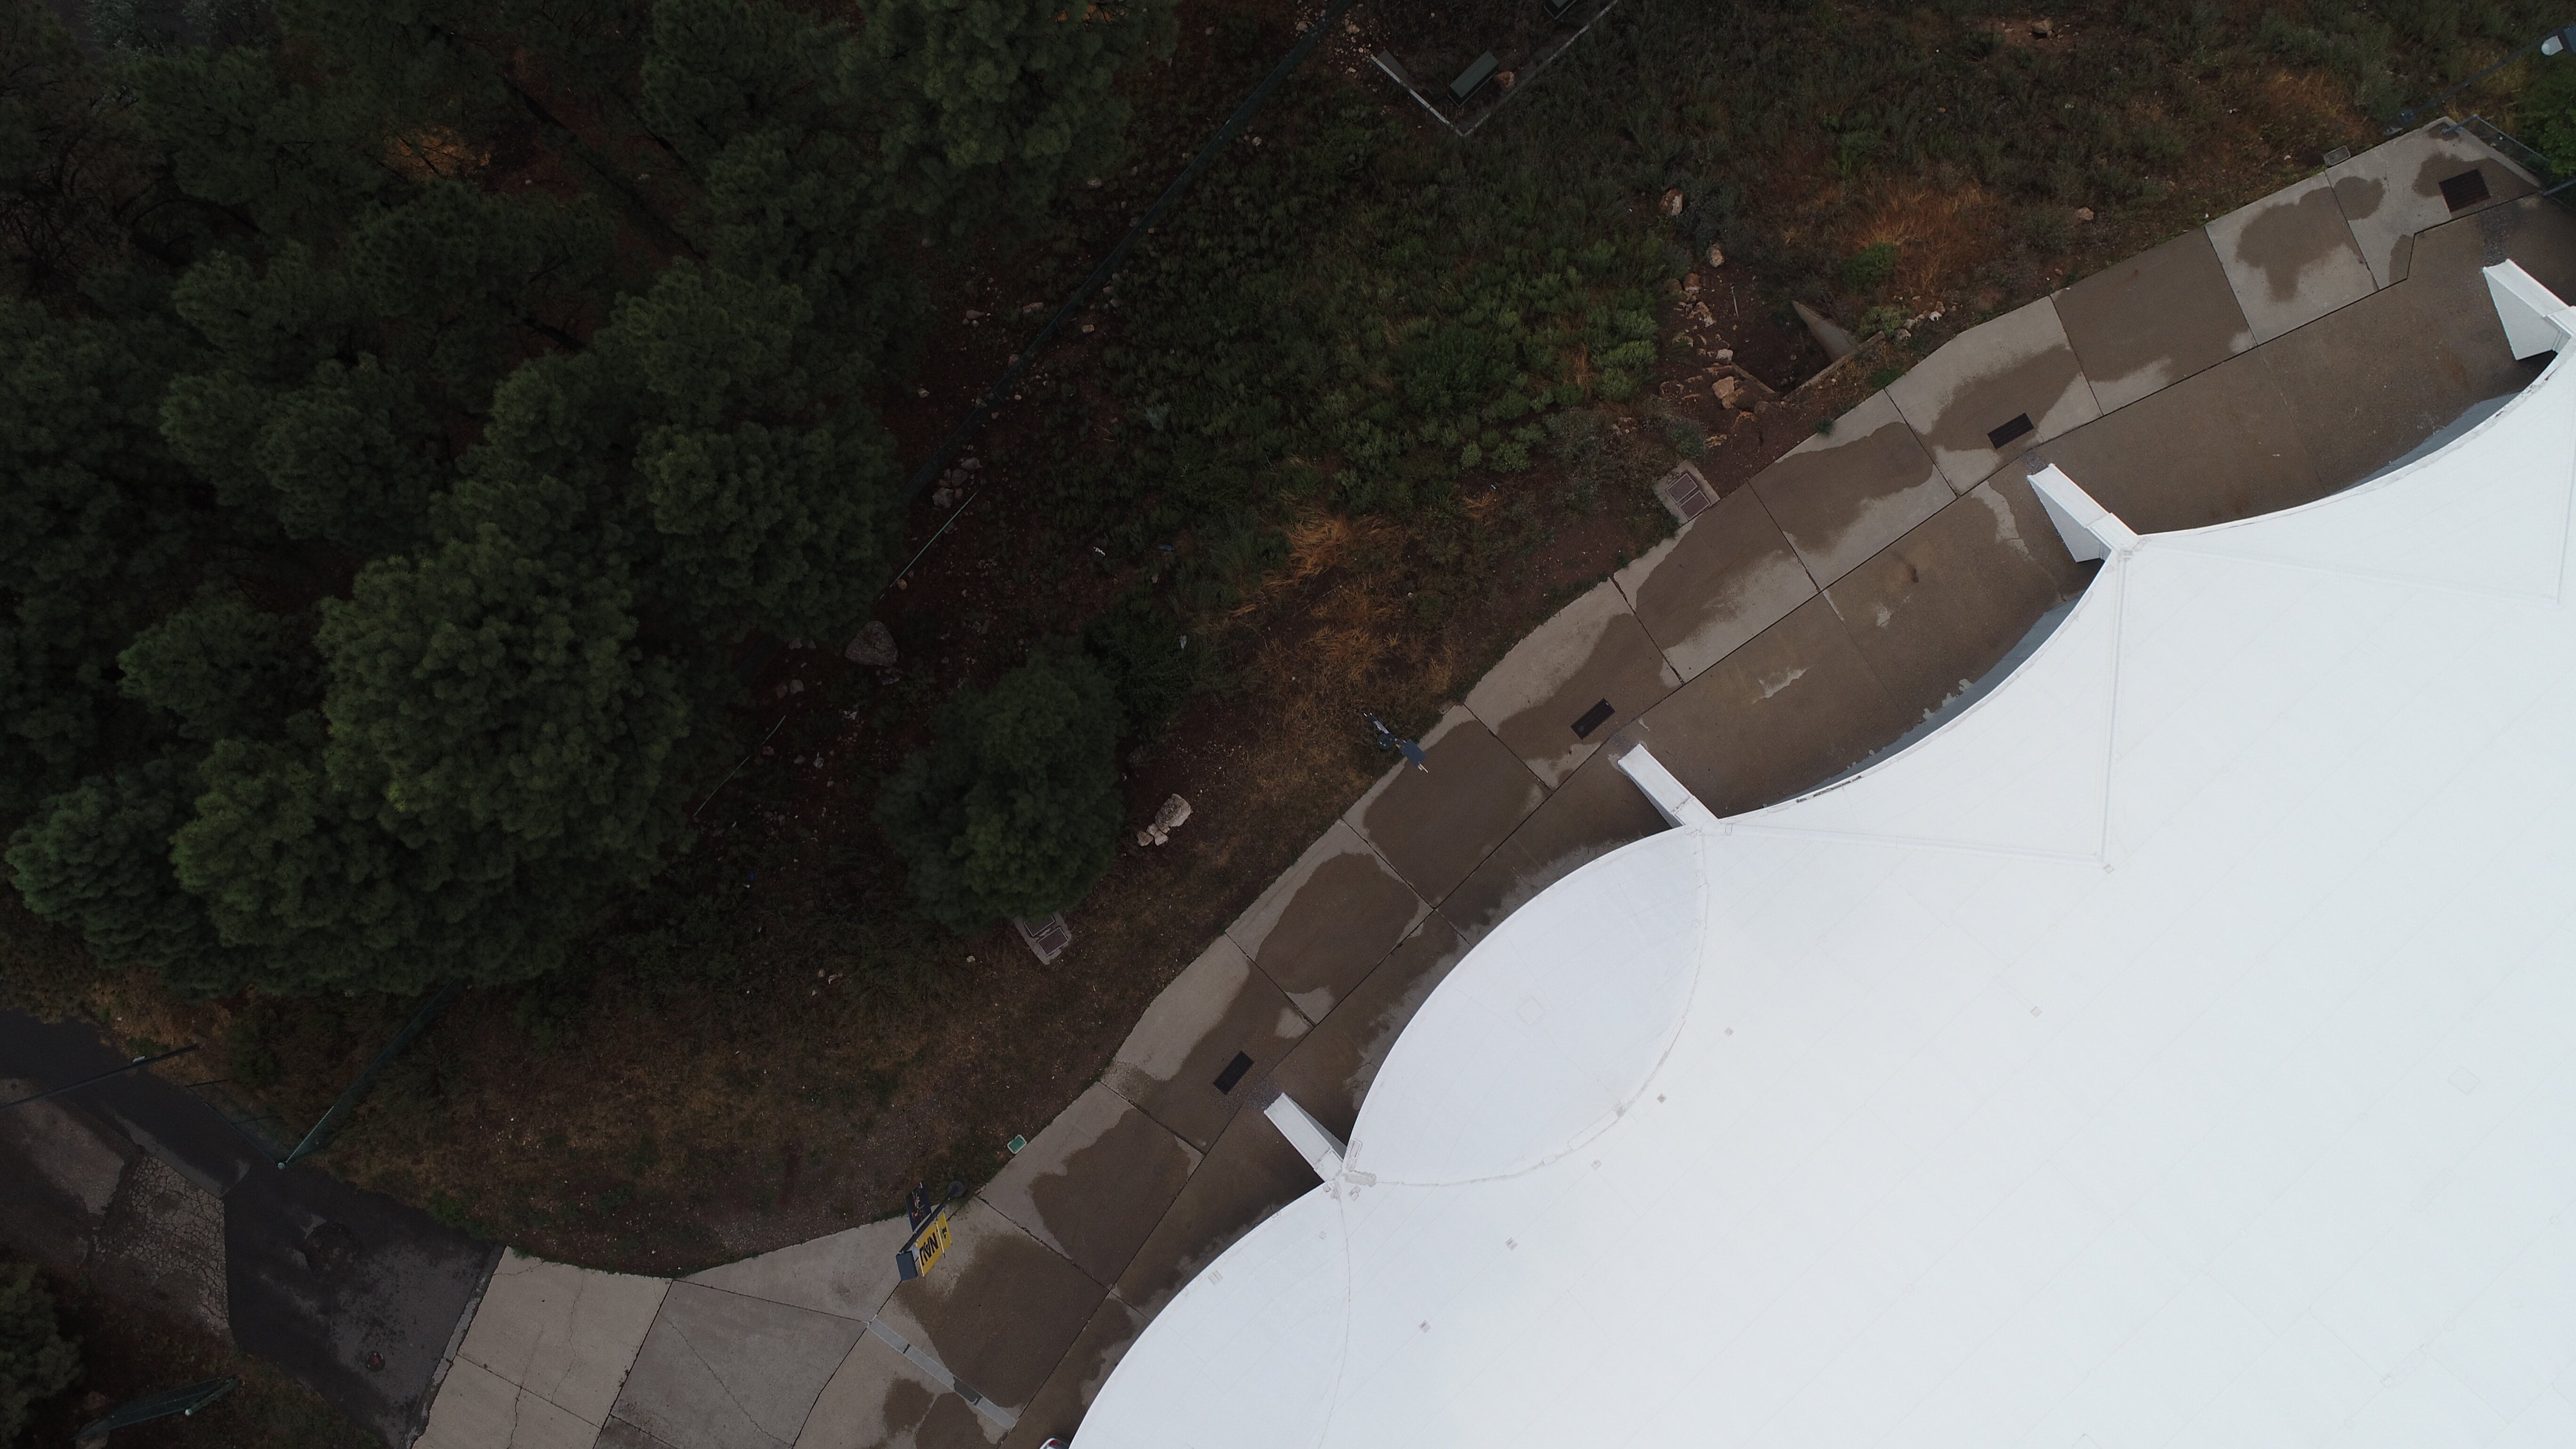
Using a DJI Phantom 4 Pro (with stock camera) and the free Pix4D Capture app, I flew a dense ‘double grid’ style mission for about 15 minutes. About 400 images were captured, which I then used to build the sparse point cloud –> dense cloud –> orthomosaic image. My hopes were low because of images like this, which was taken over the western entrance. Note the wonderful flat lighting conditions and rain puddles at the time of this image.
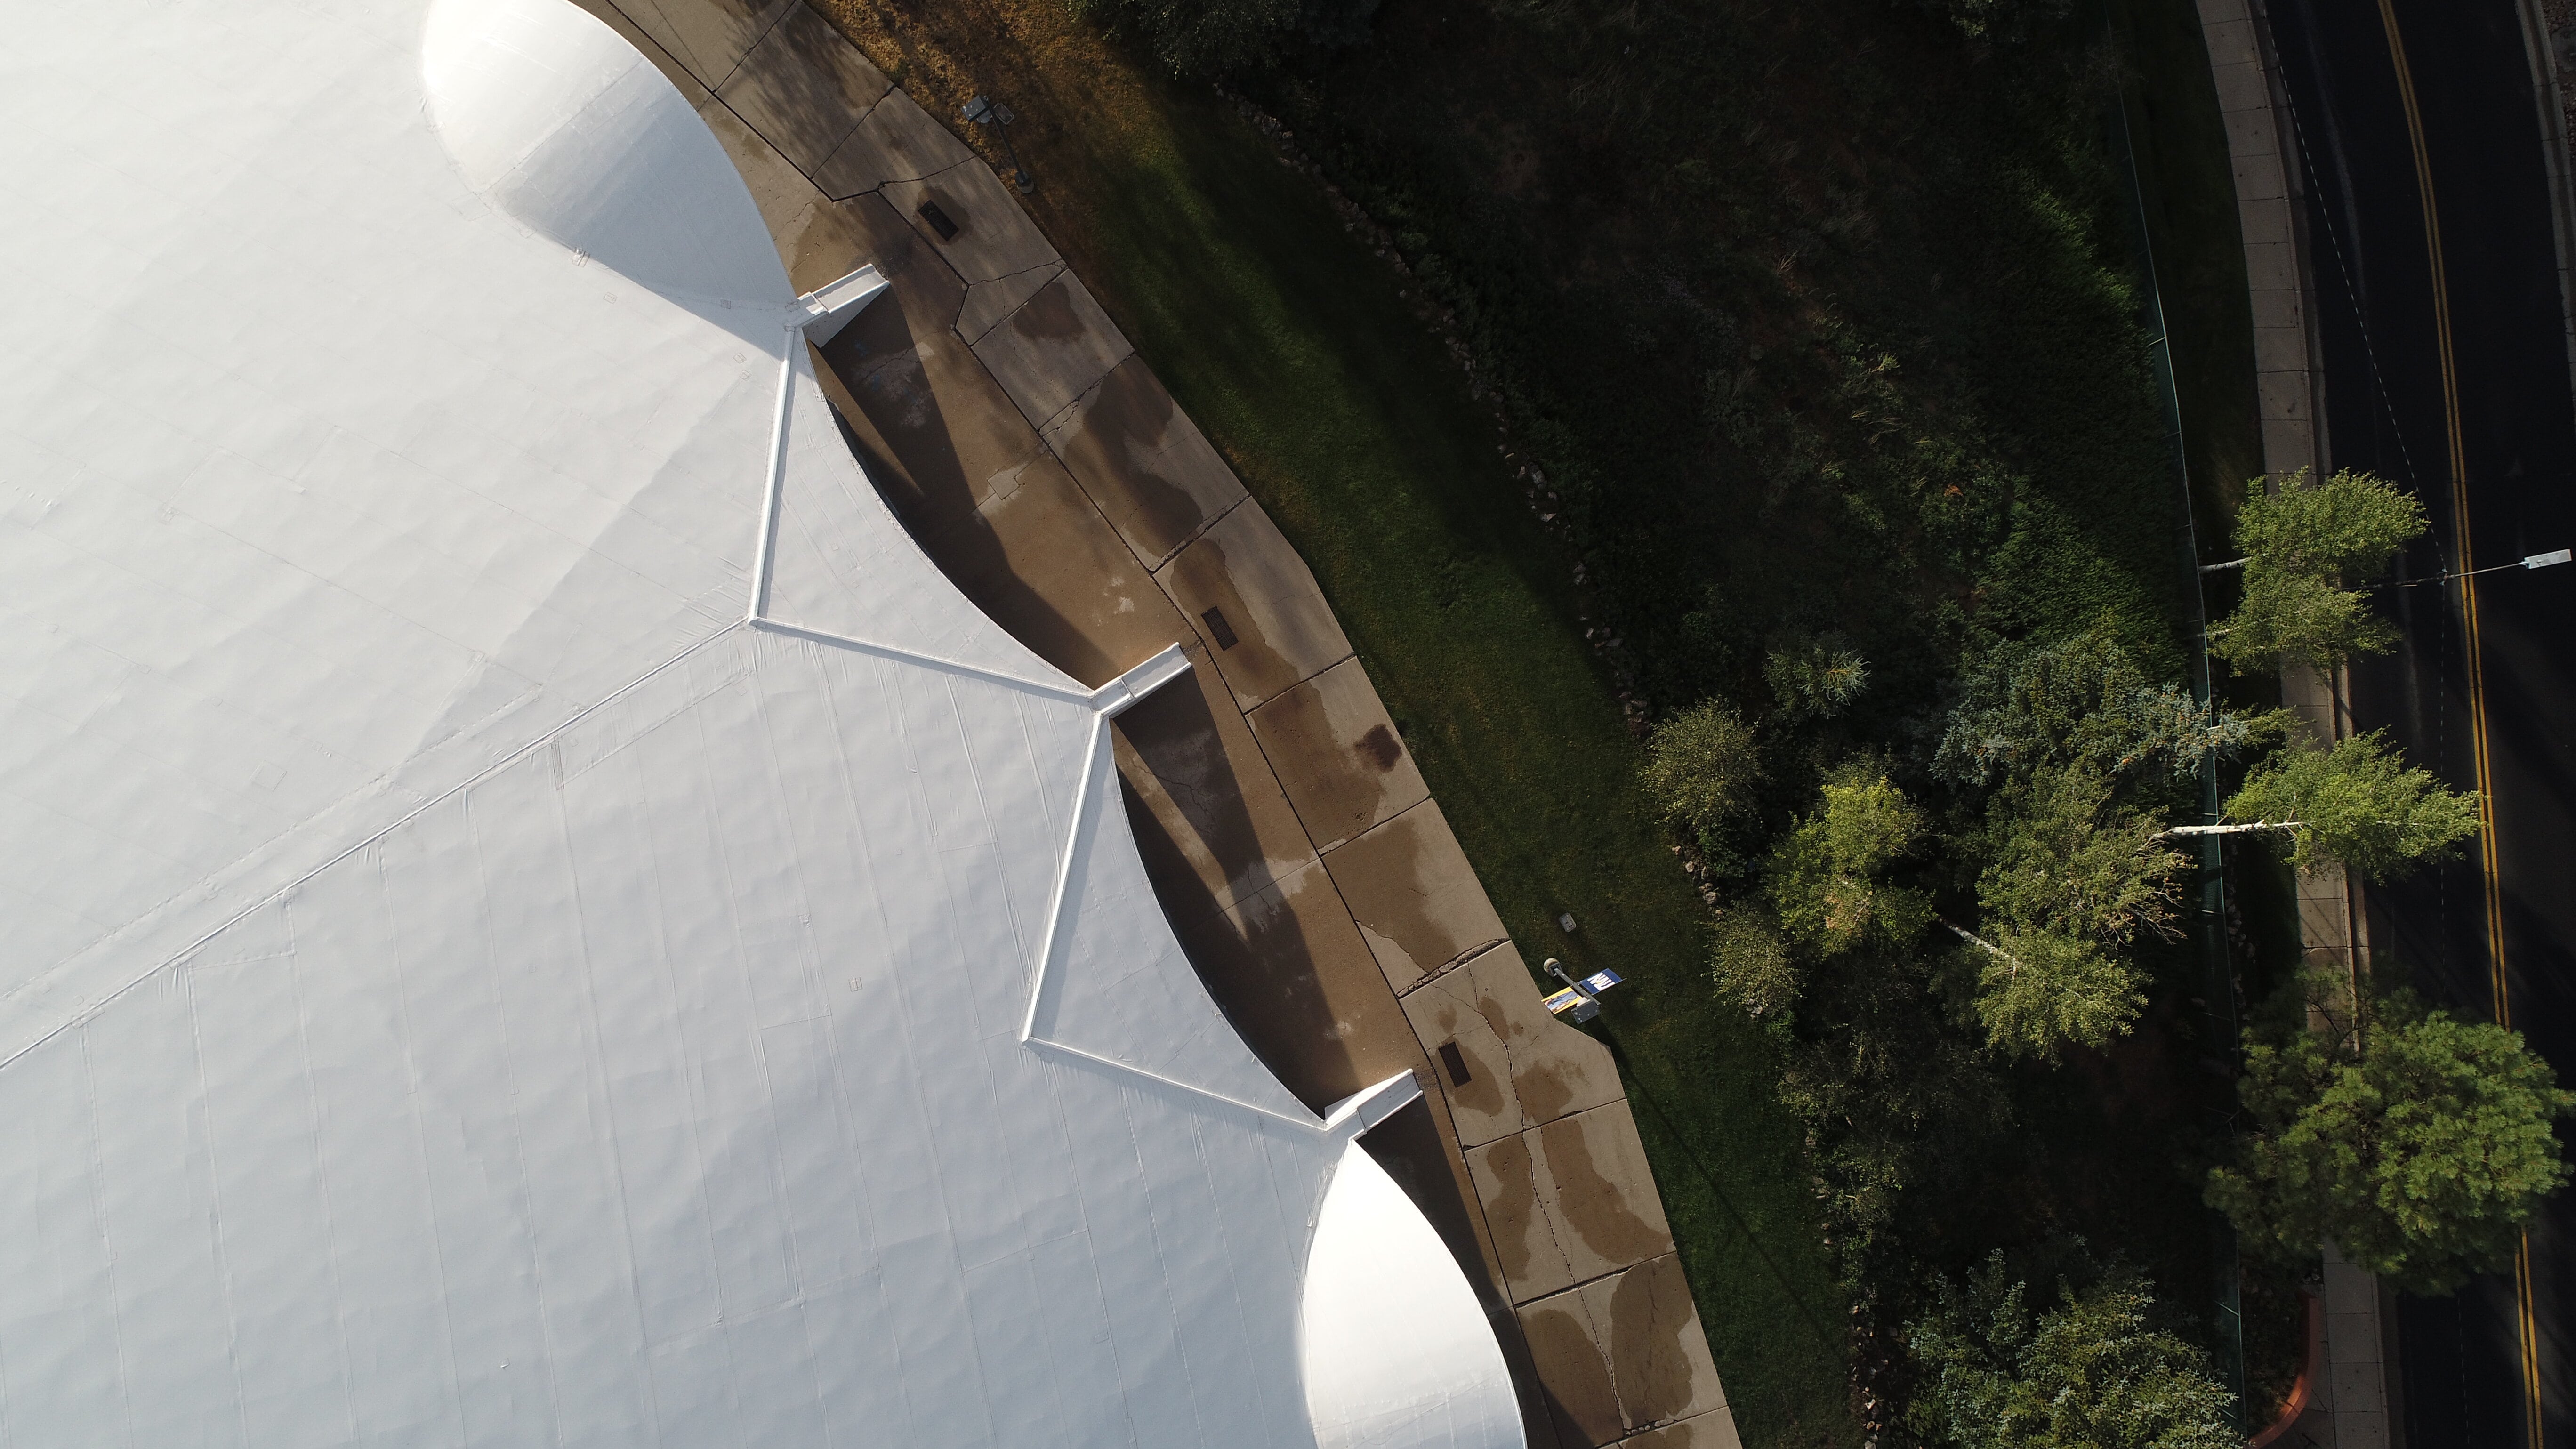
Compared to an image like this, which is more ‘sharply’ lit and taken over the north/eastern portion of the structure. When both types of these images are used to create the SfM model, general chaos and confusion can occur during the image matching and bundle block adjustment procedures.
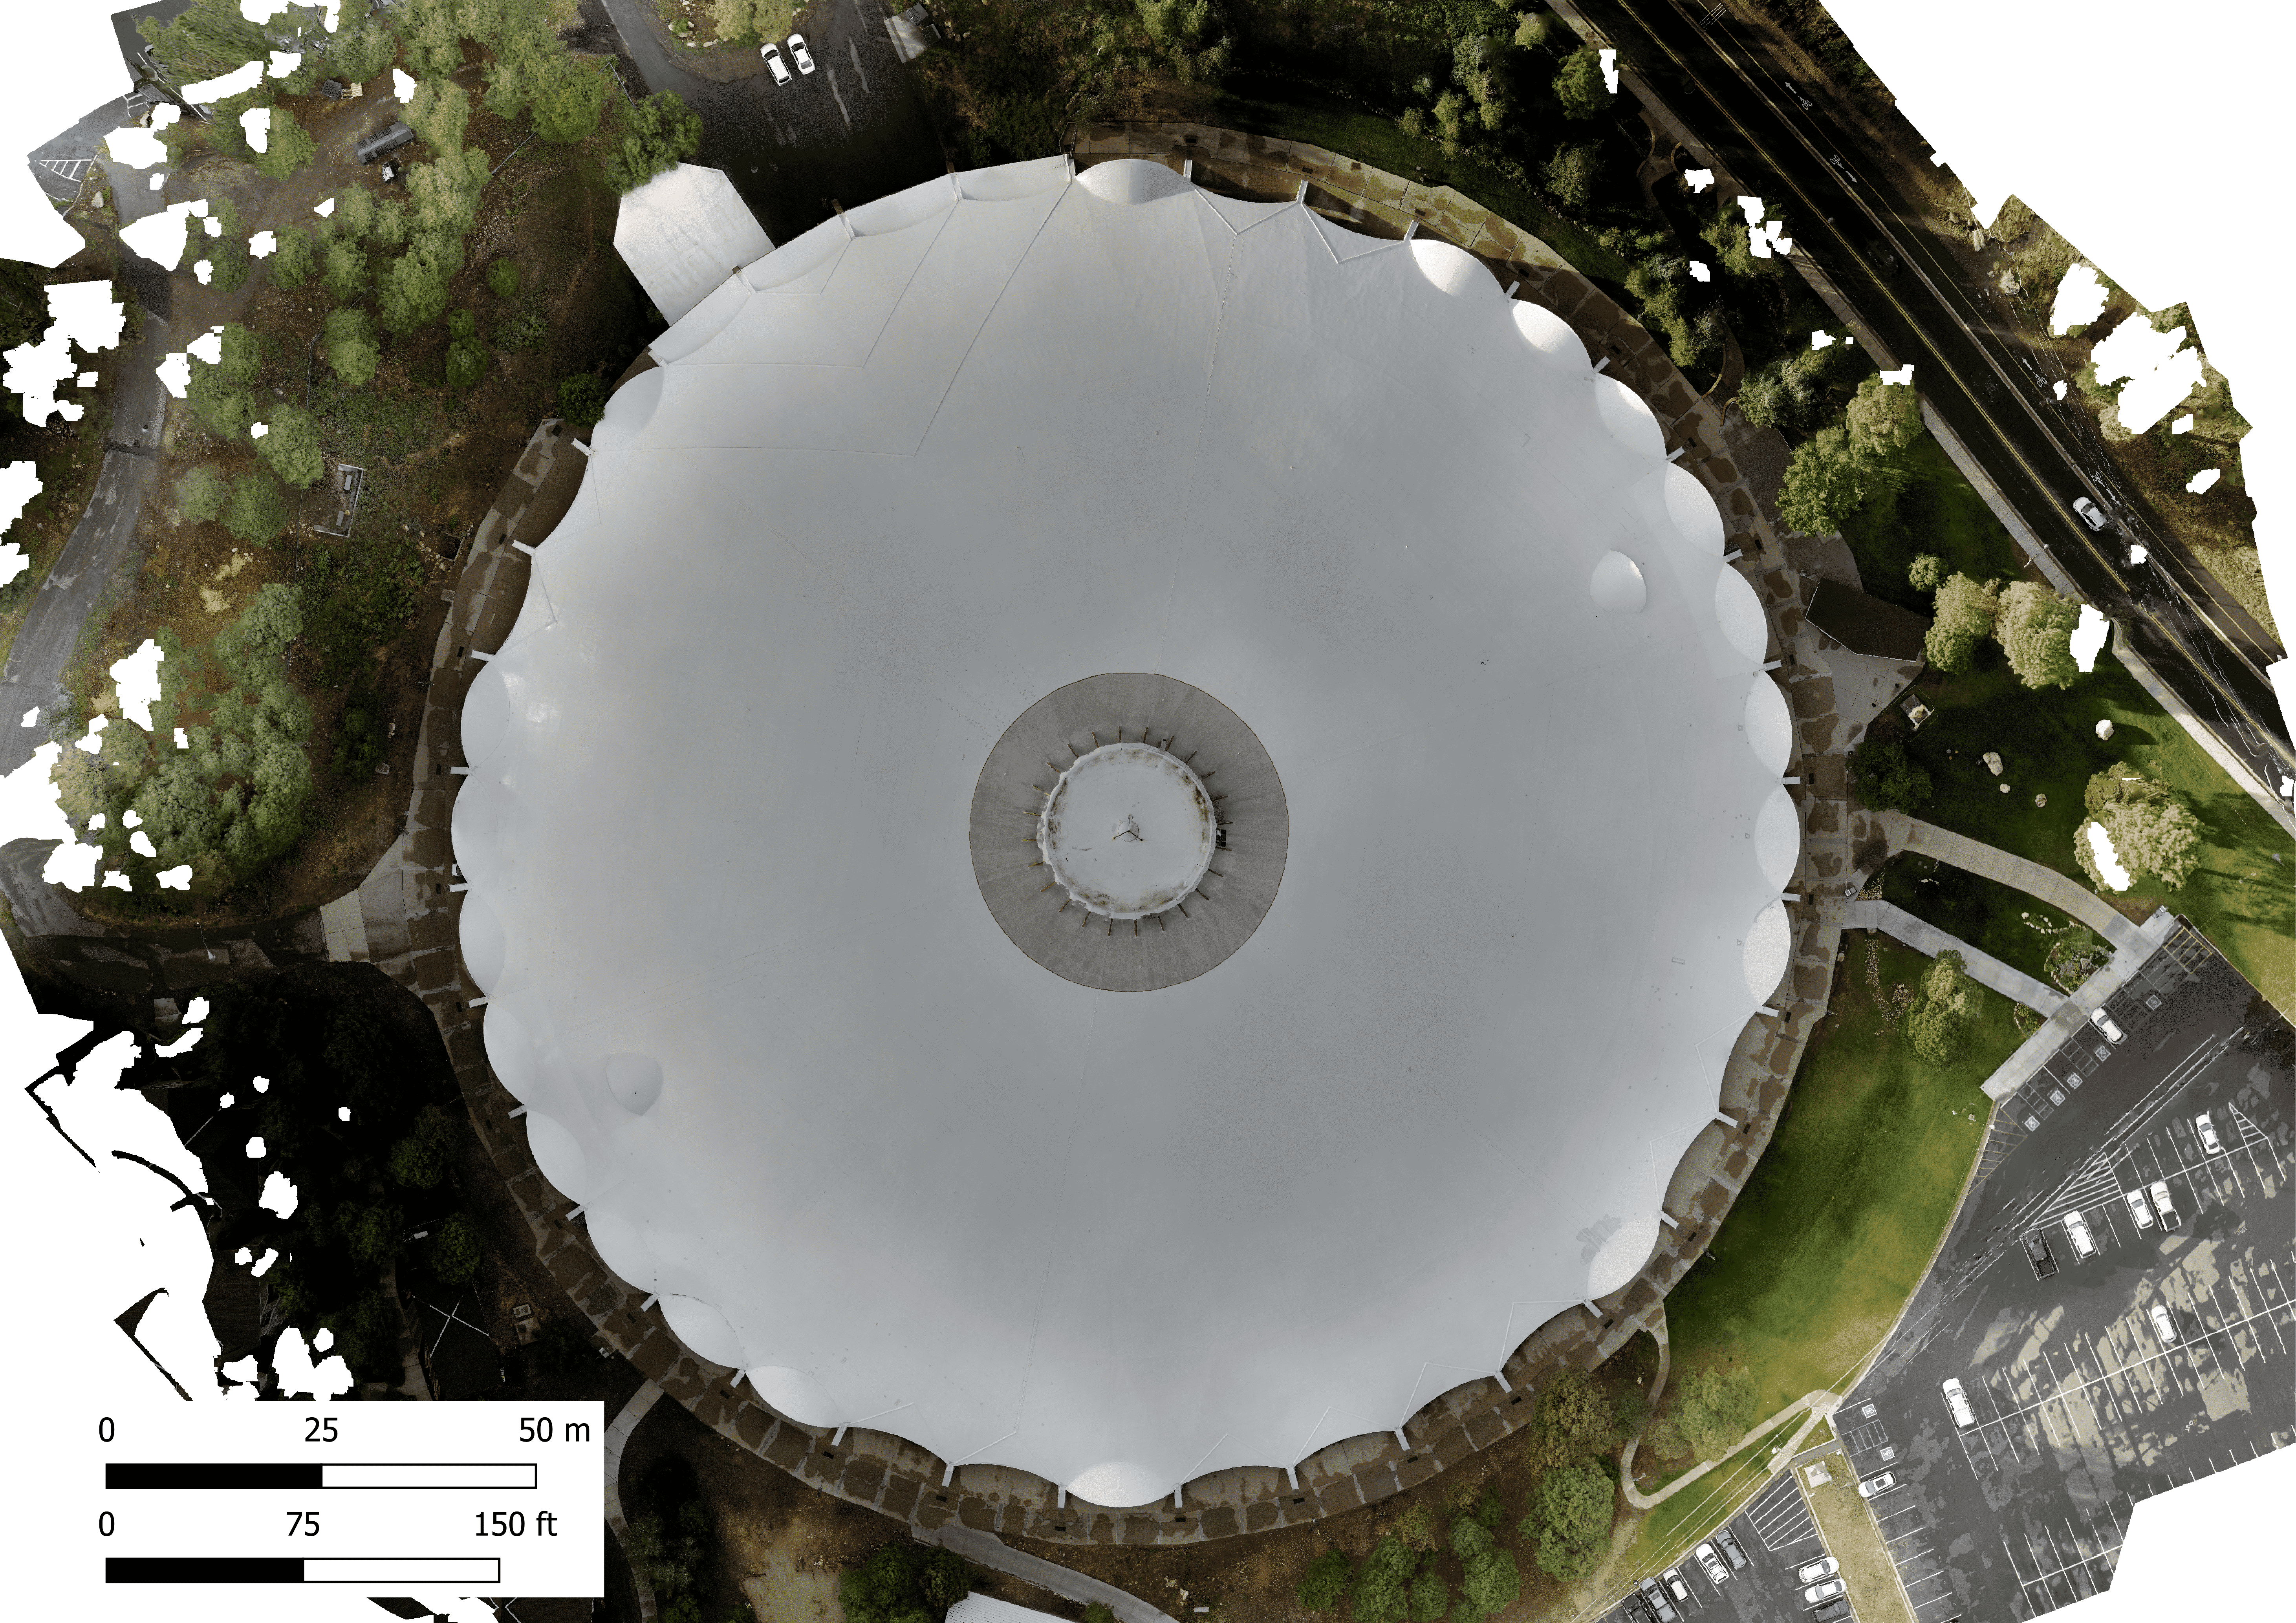
All of that being said, here is the finished orthomosaic image, which looks crisp and clean. Not too bad!
During the beginning of the process, once the sparse cloud had finished, I did some filtering of ‘bogus’ points using the process outlined in a technical guide put out by the USGS for processing UAV imagery. This usually helps tightening up the image alignment etc. because you remove points (and sometimes the images) that were likely going to be problematic during the generation of the final model. Check out these guides for a breakdown of this process:
While these guides aren’t applicable to every situation, especially if you don’t have access to Agisoft Metashape (a.k.a. Photoscan) or Pix4d or any other commercially available software, they are really useful for understanding how to tailor the SfM process to your data. They are also a great starting point to working with the SfM process and figuring out what is going on under the hood, even though there is another hood under that hood!
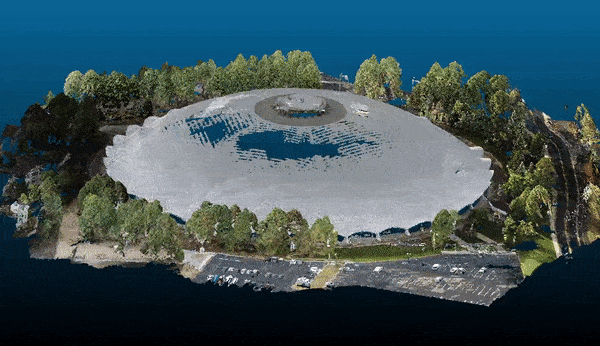
After some minor trials and tribulations, here is what the final dense point cloud looks like. It looks pretty good…except for those giant missing parts of the roof! The point cloud was gigantic, something like ~150 million points, and I had to quickly downsample it before set my computer on fire. This was the product of choosing a ‘High’ or ‘Highest’ quality setting when generating the dense cloud, and totally unecessary. But I wanted to see if I could overcompensate and patch some of those holes on the roof.
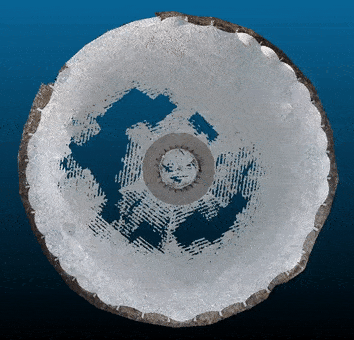
I cut out just the dome for a closer look, here is a view of it looking straight down from the above. While it may be the Wonder Bread version of the Eye of Sauron, I wouldn’t push your luck and stare at it for too long. You waived your right for legal action when you scrolled down this far.
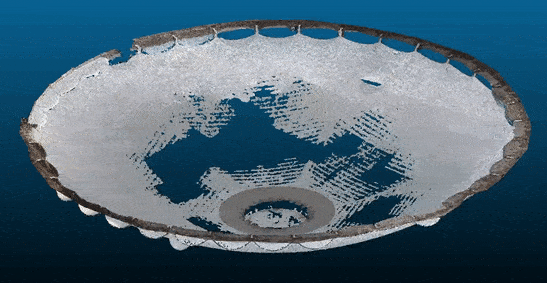
Here is another view of just the dome, this time I flipped it over on to it’s top and we are looking ‘inside’ it from above. As an interesting aside, NERD ALERT , I thought it would be fun to calculate its volume. Which, according to the 2.5D Volume tool in CloudCompare is ~2.1 million cubic feet.
Thanks for sticking around this long, I hope you enjoyed and happy SfM’ing!
Adam Belmonte
Applied Scientist
I am a remote sensing and data scientist focused on natural resource management.